Archive for the ‘Philippines’ Category

How to create Mind Maps using Mind42

How to Mind Map

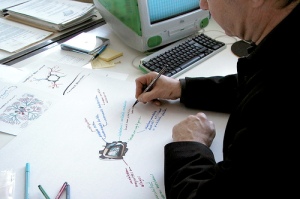
Photo by For Inspiration Only (on flickrCC)

Do you have an idea but you have too much free thinking around it?

Do you need to organize your thoughts on a project in a focused and structured manner?

Do you need to clearly and easily communicate your vision to others?

Then you need to mind map it.

What is a mind map?

A mind map is a diagram used to visually outline information (Wikipedia). It is a great way of unraveling your thoughts and visualizing your ideas.  A mind map is built from a single topic. This topic is located at the center, thus it is called the central idea.  Usually, an image is used to represent the central idea. Then other ideas branch out from the central idea. We create branches and sub branches to represent these ideas related to our main topic. Here, we can use specific colours per branch to make each idea distinct and appealing. Place one keyword per branch. At first, this is hard to do since a single word is sometimes not enough to describe or express an idea. Keep practicing and eventually you get the hang of it. You can also put an image to a branch to visually describe your ideas.

Mind mapping with Mind42

Mind42 (pronounce as mind for two) is a free collaborative mind mapping tool. It is browser-based so there is no need to install. You just need to open your favorite web browser and go to mind42.com to launch the application.

Mind42 is easy to use for editing and sharing mind maps online. Mind42 can be shared with others via email, URL link, or be embedded into your blog or website. An even cooler feature of Mind42 is it let other users to collaborate on your mind map.

There are a lot of other mind mapping tools out there that you can use for free or for a fee.  Lucidchart, Bubble.us, Wisemapping, Mindmeister and IMindMap are some of the mapping tools I tried.  I think Mind42 has the most features there is for a collaborative mind mapping tool. And you can use it for free.

Here is a step by step tutorial on how you get started mind mapping using Mind42.


I also like using IMindMap because of the use of organic branches and have a cartoon-like visual perspective.

You can also do a mind map by hand. You just need a paper and some colored pens. Well, that how mind maps were originally made until mapping tools came to be.  You can choose either way in creating mind maps for your topic of interest.

Mind Map Guidelines

Tony Buzan, a known expect on mind maps, gave us a few guidelines to help us create visually stimulating mind maps:

  1. Start in the centre with an image of the topic, using at least 3 colours.
  2. Use images, symbols, codes and dimensions throughout your Mind Map.
  3. Select key words and print using upper or lower case letters.
  4. Each word/image must be alone and sitting on its own line.
  5. The lines must be connected, starting from the central image. The central lines are thicker, organic and flowing, becoming thinner as they radiate out from the centre.
  6. Make the lines the same length as the word/image.
  7. Use colours – your own code – throughout the Mind Map.
  8. Develop your own personal style of Mind Mapping.
  9. Use emphasis and show associations in your Mind Map.
  10. Keep the Mind Map clear by using radial hierarchy, numerical order or outlines to embrace your branches.

Using Mind42, here is my version of a mind map based on Buzan’s guide on creating mind maps.

How to Mind Map using Mind42

How to Mind Map using Mind42


Here is another mind map I made using IMindMap.

How to Mind Map using IMindMap

How to Mind Map using IMindMap


As always, I wish I helped you gain more learning from this tutorial. Let me know how your mind mapping experience went.

How to Use ShortStack to Create a Facebook Contest

How to Use ShortStack to Create Facebook ContestsWould you like to increase the engagement activity in your Facebook page? You have a marketing strategy and that you would require names and emails of your target customers. Would you like them to give you their information?

Why not run a contest? Stir up a buzz by doing a sweepstakes. Everybody loves free stuffs and winning it by chance makes it even more exciting.  Raffle off a very nice price that they won’t want to miss out on.  This is a great way to promote your page and increase your fan base. You can also do a photo or video contest. Let your fans participate by submitting their own photos or videos; or voting for the photos or videos they like. I am sure this will build a lot of hype and engagement to your page.

Running a Facebook contest, however, is not that simple and straightforward. There is a right or should I say ‘legal’ way of doing so. According to the Facebook Page Terms and Standards, promotions should be run using a third party app. This includes sweepstakes and contests of any form. Using the like button and other features and functionality within Facebook is not allowed in any promotional activity. If you do this, Facebook can delete or remove your page.

So, what is the right way of doing a contest? Use an app. In this tutorial, I show you how to create your own Facebook contest the right way by using an app template available at ShortStack.

ShortStack is a design tool which allows you to create your custom Facebook tabs to suite your promotional needs. It also has a variety of widgets and templates which you can use to run your contest right away.  You can use ShortStack for free if you just need to run a simple sweepstakes contest. However, you need to avail of their paid services for several features like database storage for storing your promotional entries and analytics for monitoring your interactions over time.

Go to my Facebook page to see my sample contest. Let me know if you have any questions regarding this tutorial. Have a great day!

How to Create a Facebook Page for your Business

At this point in time, having a Facebook Page for your business is a must. With 800 million users1, Facebook is still the number one social media platform for online promotions and customer engagement.

How to Create a Facebook Page for your Business

By Alessio85

Facebook is free to use, so there is no worries if you are a small business with little or no budget for putting your business online. Having a Facebook page for your business is a good marketing strategy to build your online presence, engage your customers and expand your network by meeting new clients and business partners.

With Facebook, you can put up your company profile and share different types of information, such as photos, videos, blog posts, links to other sites, and other media to promote your business and services. You can now easily alert your customers whenever you have updates to share about your business.

Facebook got a new face

Last March 30, 2012, Facebook fully launch its new layout called Timeline. Even though there were some who literally ‘unlike’ the changes, Facebook has push through with its implementation of the new layout and a long with it some exciting features in posting updates and facilitating engagements.

One very distinguishing feature it presents is the cover photo. Located at the top of the page, your cover photo is the first thing visitors see. It has become the first and foremost face to promote your business or brand. They say, first impression lasts, so it is advantageous to have a unique and eye catching image that represents your page.

The Facebook cover photo is an image file (jpg or png) that’s 851 pixels wide and 315 pixels tall and less than 100 kilobytes. Your image can be the main product of your business, a photograph of your customer enjoying your service offerings or some events which highlight your company’s milestone.

Another identifiable part of the page is the profile picture. It is the 180 x 180 pixel image on the lower left corner of your cover photo. Since the cover photo and the profile picture overlap, many users even had the vision to blend them together into one single image.

Your cover photo is not limited to photos per se. You can also use text, charts, or graphs that you feel can convey your point across to your audience.

For example, this my current cover photo which is a wordle base on this blog.

Facebook cover photo

wordle base on livingavirtualassistantlife.wordpress.com

The possibilities are infinite. However, there are some rules to consider. These are:

No Price or Purchase Information.Do not put “40% off”, “Download it in our websites” and other similar statements regarding your prices and other promotional information you advertise. You can do these things on your timeline but not in your cover photo.

No Contact Information. Don’t include your website, Email, snail mail address and other contact information. Your contact information is better off listed in your page’s About section.

No References to User Interface Elements. Don’t include “Like us”, “Share” and other Facebook engagement actions on the photo cover. Arrows pointing to the like button is not allowed as well.

NO Calls to Action. Don’t put “Get it now!”, “Tell your friends about us” and other similar statements which suggest a certain action towards your visitors. You can do these things on your tabs and timeline.

Facebook cover photo don'ts

Facebook timeline photo cover rules

Your cover photo is the part of your pager where you really need to experiment and be creative in order to grab attention right at the very start and get that page like you deserve.


Highlighting, pinning and milestones

There are new ways to showcase you post in your timeline. Now you can “highlight’ or ‘pin to top’ your post so that your audience any important posts or events you need them to know immediately.

Your timeline is divided into two columns, in which, your most recent post occupies the top left corner of your timeline. When you ‘pin to top’ a post it automatically sends the post to the top left corner of your timeline. That posts now becomes the first article of your timeline, thereby, giving it a greater chance for engagement. A pinned post stays in that position for 7 days or until you create your next post after said number of days. You can only ‘pin to top’ one post at a time.

Highlighting makes the post wider. A highlighted post takes both columns on your timeline. This makes the post very noticeable and hard to miss. You can highlight more than one post. The best posts to highlight are photos and videos.  Note that you cannot “pin to top” and highlight a post the same time.

Highlighting lets you see the whole picture.

Highlighting lets you see the whole picture.

Milestones are important events you want to insert in your timeline.  Examples of milestones are the day you launch your company or a product, your first sale, the completion of a very big project and any other events you want to document. Now you will be able to remember these dates from your timeline. Milestones are like highlighted posts which occupies the full length of your timeline.

These are just some of the new features in the new Facebook timelines. To create your own Facebook page for your business, follow my step by step tutorial below. It also includes instructions on how you can upload your cover photo, post your updates and highlights.

There are a lot more features which I hope to cover in future tutorials so keep coming back or better yet subscribe to my blog to get future updates and tutorials. Please like this post or leave a comment if you have any questions about things I discussed or fail to discuss here. Thank you and I hope hear from you soon!

A Short Course on Adobe Photoshop and Web Graphic Design – Part 2

The second day of the short course is mostly on web design. The day started with a discussion on the 9 essential principles of effective web design. The document below summarizes the discussions made during the lecture:

An Exercise of Putting Things Together

We were asked to design a webpage for a made-up Iphone App. To set -up Photoshop for Web designing, our instructors gave us the following pointers:

  • For web designing, set the Photoshop page dimensions to Web of size 1024px by 768px.
  • Use the Photoshop’s Rulers (Ctrl+R) and Grids (Ctrl+’).
  • Set fonts and line heights. Nowadays, the standard text size of websites is 13 to 14 font size.
  • Set the color scheme of your design. A useful color scheme reference is found at colorschemedesigner.com.

This is the design I made using Adobe Photoshop.

The design I made using Adobe Photoshop

To translate the above design into a webpage, we need to do HTML and CSS programming. The instructor gave a quick lecture on html and CSS programming. We were given sample HTML and CSS files so we can work on our own. Below are the sample programs I made to create the webpage.

Inside index.html

<head>

<link rel=”stylesheet” href=”style.css”/>

</head>

<body>

<div id=”wrap”>

<div id=”column1″>

<div id=”logo”>

<img src=”images/logo.jpg” />

</div> <!– end #logo –>

<div id=”text”>

<h2>MOBILE APPS FOR THE NEW AGE TRAVELLER</h2>

<p> Technology in the world today is changing, adapting and moving so fast that it is sometimes hard to keep up. You only need to look at how we go about sharing and acessing information to see that we truly are living digital. I see the Digital Age as various applications and technology allowing quick communication globally. This ultimate apps shapes how we gather, access, retrieve and share information.

</div> <!– END #text –>

<div id=”apps”>

<img src=”images/appstore1.png” />

</div> <!– end #apps –>

</div> <!– end #column1 –>

<div id=”column2″>

<img src=”images/iphone.png” height=”550″ width=”250″ />

</div> <!– end #column2 –>

</div> <!– end #wrap –>

</body>

List of image files under the Images subfolder


Header Image File

Header Image File (header.jpg)

The Logo

The Logo Image File (logo.jpg)

The App Store Image

The App Store Image File (appstore1.png)

The Iphone Image File

The Iphone Image File (iphone.png)

Inside style.css

body{

margin:0;

padding:0;

font-family:arial;

font-size:12px;

line-height:18px;

color:#fff;

background:url(images/gradient-background.png)
repeat-x #3d7888;

}

#wrap{

margin:0 auto;

padding:180 0 0 0;

background:url(images/header.jpg)
no-repeat;

}

#column1{

padding:0 0 0 220;

width:480px;

float:left;

}

#logo{

margin:0 0 50px 0;

}

#apps{

padding:40 0 0 0;

}

#column2{

padding:0 220 0 0;

height:300px;

width:339px;

float:right;

}

#footer{

clear:both;

.clearfix:after {

content: “.”;

display: block;

clear: both;

visibility: hidden;

line-height: 0;

height: 0;

}

.clearfix {

display: inline-block;

}

html[xmlns] .clearfix
{

display: block;

}

* html .clearfix {

height: 1%;

}

The App Page

The resulting Iphone Apps Page looks like this:

Screenshot of The App Page

Screenshot of The App Page

Lessons Learned

What I have learned from this short course is that it is possible to learn Adobe Photoshop and Web Design in a short time.  But, it was not easy to have everything in two days. That is what I wrote as my recommendation in the training’s feedback form. It would be better if the training facilitators to extend the course program three days to allow participants more time to do the exercises.

With regards to what I have learned from this training course, I need further practice to fully grasp the knowledge and the know-how in using Photoshop. I have a basic background in html programming and that help me to cope with the programming part of the exercise. Still, I need to restudy HTML and learn CSS programming.  With more practice and training, I can create well-designed websites in the future.

If you are interested in designing and developing websites, I recommend that you take this course.

========================================================

Web Graphics Design Resources:

http://www.lipsum.com/
http://colorschemedesigner.com/

Homepage


http://kuler.adobe.com/
http://www.google.com/webfonts

Sample websites:

Home


http://www.immersive-garden.com/
http://thisisaportfolio.com/
http://www.hongkiat.com/blog/40-greatest-web-interface-design-tutorials-photoshop-tutorial/
http://sixrevisions.com/web_design/20-websites-with-beautiful-typography/

Training course information:

Dates: March 26-27, 2012
Registration Fee: PhP 2,250

Instructor: Mr. Martin Cipriano, http://www.thisisaportfolio.com
Facilitator: Mr. Gerald David
Philippine Trade Training Center, http://www.pttc.gov.ph
Tel. No: (632) 468-8962

A Short Course on Adobe Photoshop and Web Graphic Design – Part 1

Adobe Photoshop & Web Graphic Design Training

Adobe Photoshop & Web Graphic Design Training

I am not artistically inclined, but I do sometimes dream I can create beautiful art someday.

I attended a 2 day course on web graphic design using Adobe Photoshop CS3 at the Philippine Trade Training Center, Philippines. I really do not know how to use Photoshop except use it to crop out pictures for my blog posts or powerpoint presentations. So I was excited to learn more than the usual. Another reason why I took this course is that I was interested how the Photoshop can be used in creating great looking websites.

Judging from the course program, the training is short but compact. First day of the training course is on the interface, and the tools available in Photoshop. In Adobe Photoshop, you work on layers of images. When this concept was discussed on the training, I was imagining a hamburger.

When you view a hamburger from the top, you would only see the bun, but when you view at the side, you could see all the layers of ingredients, i.e., the lettuce, the pickles, the hamburger patty, the cheese, etc. Similarly, the graphic image you create in Photoshop is made up of 2 or more layers stacked on top of one another.

Here are some important action keys and keyboard shortcuts to remember in Adobe Photoshop, I listed them here because I keep on forgetting them during the course.

Action Keys

Free Transform Ctrl+T to edit/resize objects on your layer
Merge Layers Crtl+E to merge one or more layers
Deselect Ctrl+D to deselect active object on your layer
Liquify Filter Ctrl+Shift+X to alter an objects shape on your layer
Invert Ctrl+I to invert an image or object

Shortcut Keys

Ctrl+Z  Redo/Undo
Alt+Ctrl+Z  Step Backward/Undo
Crtl++  Zoom In
Ctrl+-  Zoom Out
]  Increase Brush Size
[  Decrease Brush Size
F8  Object Information Window


As a hands-on exercise, we were asked to replicate an Iphone using Photoshop. I had a headache doing this, but I did learn a lot. Here is my humble attempt. Does it look close to the original?

My Iphone using Adobe Photoshop

Replicating an Iphone using Photoshop

A good tip I learned from the instructor is to always start a project with a clean slate by having only the toolbar and layer panel on your Photoshop screen.  When doing a design project, always breakdown the task into separates. This can be done by doing each objects or tasks in the design into separate layers. That way, your work is organize. Labeling your layers is also a good way in organizing tasks in your project.

To be continued…

Training course information:

Dates: March 26-27, 2012

Registration Fee: PhP 2,250

Instructor: Mr. Martin Cipriano (www.thisisaportfolio.com)

Facilitator: Mr. Gerald David, Philippine Trade Training Center (www.pttc.gov.ph)

Tel. No: (632) 468-8962


My BrainBench Games Test Results

BrainBench Games is over. I took 9 tests and here are the results:

Skills Test

Score

Ranking*

Written English 

3.42

75%

Word Processing Fundamentals

3.83

94%

Internet Concepts

3.00

56%

Math Fundamentals (Metric)

3.84

59%

Math Fundamentals

3.76

79%

English Vocabulary

4.36

98%

Computer Literacy (Windows 7)

4.07

81%

Computer Fundamentals (Win 7) 

4.15

95%

Web Design Concepts

3.25

77%

*Score higher than ___% of all previous test takers.

Not bad, huh? I wish I could have taken more test.

Taking these timed tests has been a thrill. Usually, a question is timed 180 seconds to answer (if I recall correctly, only 40 seconds were allotted for math questions). It was pleasing when I beat the clock; on the other hand, it was infuriating when the clock beats me.

BrainBench Games

By pasukaru76

Passing score is 2.75. This means you get a certification from BrainBench. When you get a score of 4.0 and up, you are dubbed a master. Aside from this, the test results lets you know how you fare from other test takers. For instance, my score of 3.42 in the Written English is higher than the score of 75% of those who previously took the test.  The results also show your strong and weak areas in a particular test or a subject matter of a skill. Certainly, the results I got gave me some directions in terms of the subject matter I need to improve on.

Thanks and more power to BrainBench. I hope there would be more BrainBench Games in the future.

PS: Kudos to the Philippines for being in the top 10 countries in the BrainBench Games. The Philippines placed 5th and 7th in the Most Certified Citizens and the Most MASTER LEVEL Certified Nation, respectively.  See complete results here.

BrainBench’s The Bench Games March 5-9, 2012

Hey guys, heard about BrainBench’s new promotion? If you haven’t, then keep on reading.  From March 5-9, 2012, BrainBench will make its entire certification test free to members.  Dubbed as The Bench Games, the event will also foster a friendly intellectual completion among nations. Champions will be chosen at a country and individual level based on test results of participating members during the promo period. For complete details on The Bench Games, click here.

The BrainBench's Bench Games

by brainbench.com

As you know, Brainbench is one of the most reliable online testing and certification websites there is in the Internet. BrainBench boast of a collection of skills tests in about 600 areas. So, if you want to build up your online resume, it would be best to be certified via BrainBench.

Guys, this is a good opportunity not to be missed. I, myself, am planning to some basic exams like Computer Fundamentals, Computer Literacy, Internet Concepts, etc.

I am hoping I get a high score and a free subscription from BrainBench. I’m crossing my fingers on this one and keeping it positive. And if you’re from the Philippines, I urge you to register and log in on the said dates and help our country win the Bench Games. Cheers!

A Virtual Assistant’s Commitment: Learn New Things

Ye hey! I am done with my Virtual Assistant assignments.  I have featured in my blog 10 tools, programs and websites I learned in the course of two months. Two months in front of the computer cutting, pasting, print screening, image cropping, doing Google searches and watching instructional videos in Youtube.

Learn

By woodleywonderworks

Thank God for Google, Youtube and everything that is the Internet. The Internet has become my playground of learning in those two months of working on this task.  Jomar was right when he said “Google is your friend.” And so are Youtube and the Internet, in general.

Google searches have become a way of life to most of us who wants to find answers to questions we encounter every day. Same goes for Youtube, where you can watch many instructional videos of anything made in our world. I think almost everything in this world can now be seen in the Internet.

I included.  I can now be seen in the internet.

How so? Through this exercise of creating how to do powerpoints and blogging, I became a part of the Internet. I get to learn, create something from what I learned and share it to the world. And that makes me feel good.

But that doesn’t stop there. Learning should stop when the task is done. I think this should be a mindset of a virtual assistant.

     Never stop learning. Always challenge yourself to learn something new and acquire new skills.

Learning new things engages the mind. It what keeps our brains active and our psychology young.  We develop ourselves through learning. That is how we form our lives. As Jim Rohn said,

programs, tools, and websites

By Pipe

Learning is the beginning of wealth. Learning is the beginning of health. Learning is the beginning of spirituality. Searching and learning is where the miracle process all begins.

So, I am going to learn more tools there is. It’s going to be part of my life, to learn tools that can help me in my virtual assistant work in the future. This how I make myself better.

This is my commitment: “To learn at least two new programs, tools, and websites a month.” 

There is so much to learn. That gets me excited! I am moving forward.

What will I learn next?

Follow my blog and share this journey with me.

Learn and Earn: How to be a Virtual Assistant

Hello World!

Virtual Assistant

Virtual Assistant

No, this is not the default blog post in WordPress but it is my first blog of my site called “Living a Virtual Assistant Life”.

You might ask, “What is a virtual assistant?” I ask myself that question too way back when I googled the phrase “work at home”. This led me to “The UltraLife of Jomar Hilario + Internet Marketing + Philippines” website by Jomar Hilario. “This is great stuff!”, I said. I like the term learn and earn because that is what I love to do.

“Learn and earn, but do it the right way”.

I might as well see what it’s all about. So, I attended the seminar called “How to Work from Home as a Virtual Assistant” last December. The seminar went great and was so informative. Just listening to Jomar’s lesson with his simple powerpoint presentation was a refreshing revelation to my eyes and brain. In the seminar, Jomar talked about the different ways to earn from the internet. You could be a blogger, an online marketer, do affiliate marketing or become a virtual assistant. You can also do two or all these things at the same time. Neat stuff huh? Now how do I explain these big words? Well, all in due time. That is what this blog is for. Right now, let us concentrate on being a virtual assistant.

Virtual assistants are self-employed professionals providing administrative, technical, or creative assistance to clients from a home office. Yes it is literally work at home thing. Good news for me because there be no more commute, no more everyday Manila TRAFFIC! You can take clients, local and abroad, who needs your talent and expertise. There are a lot of opportunities to earn big bucks in US dollars or in any other foreign currencies. You can be the new age Overseas Filipino Worker (OFW). But one good thing about it is that you are not overseas. You are here, in the Philippines, with your love ones, earning dollars and having fun!

I instantly like the idea, so here I am on my way of becoming a virtual assistant. Neat!

Why don’t you give it a try? Just attend a Jomar’s seminars and learn. I am sure you would like it too.